Tp-link router setup complete tutorial

 Typically, whoever provides your broadband Internet line will also set up your router. However, many users prefer to do it themselves.

The primary audience of today's tutorial is those who want to configure the router themselves. Furthermore, you can quickly fix any router issue if you learn this example router configuration. You will learn how to set up a Tp-link router from this tutorial.

If you learn this method, you can set up other routers and sims similarly. Other companies' routers may be slightly different, but the process is the same.


The above image you can see is written SSID: TP-link_1452 In fact, when you search for Wi-Fi with the power line of your Wi-Fi in new condition, this name will be seen as TP-link_1452.

Then see the image above to connect this name, and the password is given at the back of the router. Connect with that. If you do not get any image or information on the back, it will be connected if you connect without a password to your router.

I'm hoping you've got it all. If everything is clear, you can now connect using the password listed on the router's back.


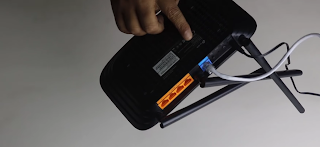
In the image above, you can see that you will have your router prepared along with your wifi line connection and power line.

Even after giving all these lines in the first case, your internet will not work. You must first work on the router's server to make the Internet work. Don't worry; in today's tutorial, how to work on the server will also be shared.

There is a Default Access link http://tplinkwifi.net which you can see in the above photo. So you enter this link http://tplinkwifi.net. 

And if there isn't a link behind your router, this link will be either http://192.168.1.1 or http://192.168.0.1. When you click on this link, a website will open.

Take a look at the above picture and see that there is a username and password admin. So when we enter the tplinkwifi.net website, we will give the username admin and password admin.


As seen in the image above, there is a username and password box. As I mentioned, enter admin in both the user name and password boxes. After that, the login is complete.

But here are some things, if there is no user name or password given in the default link of your router, assume that the user name or password is not needed, and it has to be set later.

Tp-link router setup complete tutorial

So, in the image above, you can see a setup page. You will also see this setup page if you can log in successfully. You can choose Quick Setup on this page. And click Next.

Tp-link router setup complete tutorial

You don't have to do much here; just select Standard Wireless Router and click Next. 
 
Tp-link router setup complete tutorial


You will use pppoe/russia on this page. All regular users are given a line in Bangladesh in this option. But some people buy Static Ip by paying more money to the Broadband company; they give Static; usually, pppoe/russia for regular users, or you select this option and click next.

Tp-link router setup complete tutorial

So you have to enter a username and password where you can see the username in the above picture. Now the question here is which username and password to give? You usually have no hands here. 

This implies that you are missing this user and password. Broadband service providers will now provide you with this username and password. Typically, they will provide you with this username and password.

So enter the username and password from your broadband provider in these boxes and click next.

Tp-link router setup complete tutorial

In the box labeled "Wireless Network Name" in the image above, enter the name you want to appear when connecting to your mobile device. And you can see the Wireless Password and enter the password you use to connect your mobile.

Then click Next, and your connection will be disconnected. If you turn off the device's Wi-Fi and connect to the mobile, you can see the name you have given. Click on it and connect with your given password. Your setup is complete!

Post a Comment

Previous Post Next Post